![Small [but] MIGHTY](http://images.squarespace-cdn.com/content/v1/534af3cbe4b0abec1443f1ea/1428717495243-LMFNQWMAWR317YA5XXEI/small+but1.jpg?format=1500w)


Have you ever heard the term 'Neutral Spine'? Have you ever wondered what the heck it means? Therapists and trainers often throw this term around, but I think we sometimes forget to explain the concept! Last week we discussed the differences between the appendicular and axial skeleton as it applied to core-to-extremity recruitment. This week we'll break down neutral spine positioning as it applies to the squat! Check it out below!
Small But Mighty Movement Minutes Are Here!

I started this website and blog with one major goal in mind: Empowerment through movement, fitness and training. It occurred to me recently that what I have shared with you thus far has been lacking one critical element to reach this goal. Why? Because when it comes to empowering someone through movement, simply prescribing exercises or training routines is NOT enough. Rather, a deeper level of understanding is required, such that one can make educated, evidenced based decisions, regarding exercise choice, optimal positioning and progressions. Having access to all of this information truly enables someone to take their health and fitness into their own hands, and to design an individualized training routine to meet their OWN needs and goals.
Enter Movement Minutes
A weekly video blog post (I think the techy kids call it a vlog lol) where I provide you with key concepts and recent research in the fields of Strength and Conditioning as well as Exercise Physiology. Through thousands of hours of post-secondary education, certifications, self-directed learning, and my own training, I have learned a tonne of information and critical concepts that have changed the way I train myself, my clients, and the way I teach classes. I cannot wait share this information with you in the form of weekly tips and small tidbits of information that you can apply to your own training in order to make it as safe, efficient, and productive as possible. After all...
"Knowledge is power... and with great power, comes great responsibility."
It's time to train your brain, and cultivate your mind-body connection. Building solid movement patterns, establishing good movement habits, and selecting the right exercises will enable you to optimize your training and performance to keep you healthy, happy and strong.
With all this said, check out the first Movement Minutes Post:
Bone Up on Skeletal Anatomy and Core to Extremity Recruitment
Inverted Rows
Inverted Rows are a great exercise to build upper back strength and endurance! Training your back is unbelievably important, especially if you spend a significant part of your day sitting at a desk or driving. Because we live in a 'forward dominant' society, many of us tend to have forward-rounded shoulders, tight chests, and head-forward postures. This can lead to headaches, tired and sore neck muscles, and even limited shoulder mobility. Training your back, and particularly your upper back can help balance out strength imbalances between your chest and your back and to mitigate many of the above issues.
Inverted rows are easily adaptable and can be done using rings, a TRX apparatus, or even a barbell on a squat rack. Here are a few tips you will want to keep in mind to make sure this exercise as efficient and effective as possible:
- Wrap your hands around the rings; with your arms straight, you'll want your shoulder blades directly under the straps of the rings.
- Imagine you are doing an inverted plank. Squeeze your bum, tighten your abs, and lock your pelvis to your ribcage. You want to move your whole body as one unit.
- Start this movement by pinching your shoulder blades together, back and down towards your pelvis. You'll want to 'double-chin' yourself to keep your spine long, with your shoulders away from your ears.
- Once your back is engaged, start pulling with your arms, slowly and smoothly until your chest is at the level of the rings/TRX/Barbell. Try to avoid curling your chest up at the top - rather, pull your whole body up as one unit.
- Reverse this movement on the way down. Remember to stay tight at the bottom; don't let your bum droop towards the floor.
In terms of difficulty, the closer you get to standing, the less of your bodyweight you'll be supporting and the easier the exercise will be. On the other hand, the closer you get to the floor, the harder the exercise will be. I usually program these in sets of 5-15, with the progression and reps dependent on the fitness level of my client.
Give this exercise a try, and see how it feels! Happy pulling friends!
j
The Burpee

Who doesn't love burpees? They're a great calisthenic exercise for strength and power development, as well as for conditioning. There are many different ways to do burpees; I like to streamline this movement into a 'controlled fall' to make it as efficient as possible. Here are the movement cues I use when doing or teaching the burpee:
- Keep your core tight, stay compact, drop towards the floor, catching yourself in the bottom of a push up position.

- Press your chest up off the floor (similar to an updog)

- Pike your hips up towards the ceiling, keeping your legs relatively straight (but not locked)
- Pull your legs in, jump and clap (don't forget the clap, it the most important part! ;)


In order to keep your heart rate from skyrocketing, focus on the rhythm of your movement and breathing. When you're practicing, you may even want to use a metronome. (I use the MetroTimer app for iPhone).
Another quick tip: If you're required to touch a target a certain distance above your head, keep your legs and feet as close together as possible as you pull them in; this will minimize the distance between your hands and the target. If you are not required to touch a target, keep your feet a little further apart, as this will minimize the distance you have to drop to the floor.
The Push-Up
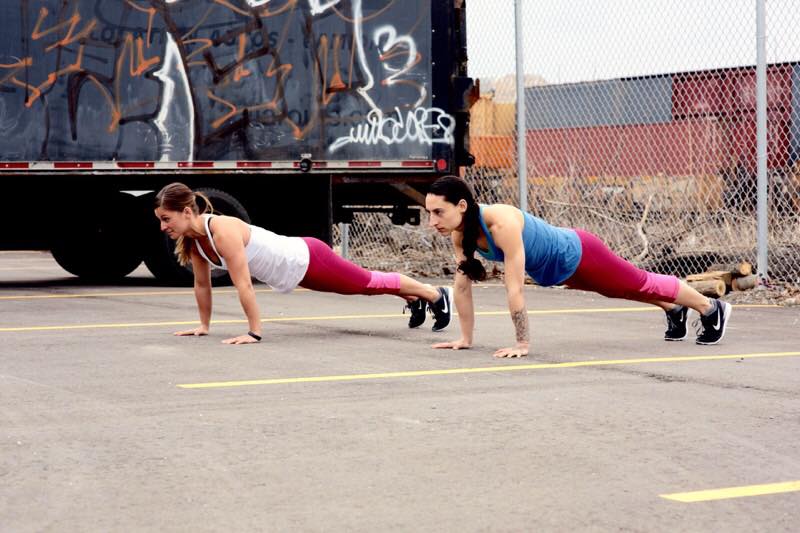
Your push up should be like a moving plank; you want to be connected from your fingertips, all the way to your toes! Pictured here, myself and my business partner Paluna Santamaria. For a week of great training and movement tips, join us a we co-lead the Adaptation Fitness Urban Retreat at Academy of Lions, June 1st-5th 2015. Info available here https://smallbutmighty.squarespace.com/shop/adaptation-fitness-urban-retreat
The Push up is a great exercise for building upper body strength. Despite its simplicity, there are many ways to do this exercise incorrectly. Here are few tips to help make your push-up as efficient as possible:
- Start your set up by getting into a tabletop position. Roll your shoulder blades down and back, like you're trying to put them in your back pocket. From here, move into a high plank so your abs are tight and your shoulders are stacked over your wrists.


- Press into the floor, like you're trying to push it away from you as you lower yourself towards the ground. Remember to keep your shoulders away from your ears. Keep your spine long by reaching the crown of your head towards a far wall.
- Move though a full range of motion by touching your chest to the floor.

- Keep your elbows tucked tightly into your sides as you push up from the floor; avoid letting them flare our to the side.
Here are some modifications you can try to make the push up a little easier. If you're not getting your chest all the way to the ground, its time to try one of these regressions so you can build strength through the full range of motion, and work up to the full push up:
- Drop your knees to the ground: Remember, you want to maintain a connected, plank position. Don't let your bum come up into a plank position.

-OR

- Elevate your hands on a box: The higher the box is, the easier the push up will be. Remember to keep your shoulders stacked over your wrist. If you don't have a box, use a bench, or a squat rack with the bar set up in a stable position.
- You can also alternate the muscles you recruit by changing up your hand position between sets. If you keep your hands tight to your torso, you'll have greater recruitment of your triceps (arms). If you move your hands further apart, you'll have greater recruitment of your pec muscles (Chest).
If you're able to move through the full range of motion for at least 15-20 reps, and want to try something a little more challenging:
- Lift one foot off of the ground

- Elevate your feet on a medicine ball or box
- Try a 1&1/2 push up
I hope this helps friends! Get out there and get pushing! Don't forget to check out the Adaptation Fitness Urban Retreat!